
Problem: Find a set of awesome desks for cheap that fit our style and brand.
I wanted to have an awesome pair of desks in the office but considering everything I found that I loved was insanely priced. I refused to fork up the very pretty pennies that it would take to call them mine. Possibly something as close to a Restoration Hardware knock off as I could find that existed on a tight budget? Nope. Trust me I searched.
Answer: DIY. Check out how we made the set of desks we have, what you need to make your own, and the process we did to make them.
Supplies Needed:
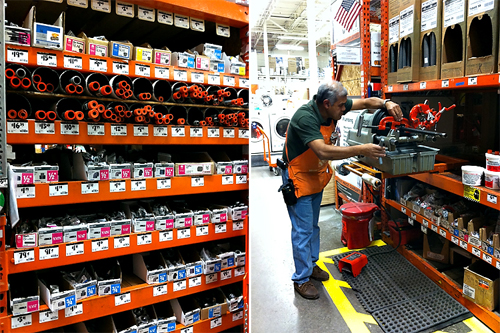
Legs: (Found in the Plumbing Department at your Local Hardware Store, Per Desk)
3/4 ” Black Steel Pipe.
3″ x 3
10″ x 6
24″ x 2
48″ x 1
T’s x 6
Caps x 4
Flanges x 4
For some of the pieces, we needed to have them cut down to they would be the correct length, and our trusty Home depot guy was able to help.
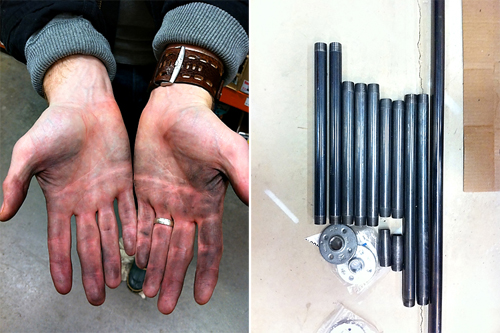
While you are picking out your pieces of piping and making your measurements, (or in this case my awesome husband) remember that stuff of the pipes is dirty and greasy, so come prepared with some rags for clean up.
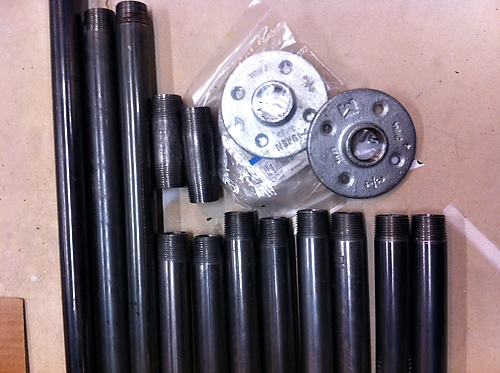
Some of the pieces for one desk ready to go.
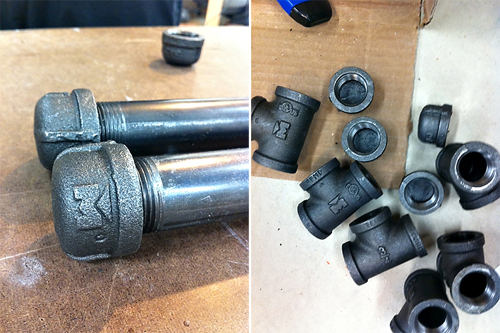
The T’s and ‘Caps’ that we used. There are other options that you can choose for caps, which we used for our feet, but these little guys were the cheapest. I think if we had hardwood floors then I would have picked something with a little more girth to them but once these are on the carpet they blend right in. Good or Bad? Cheap is all I know.
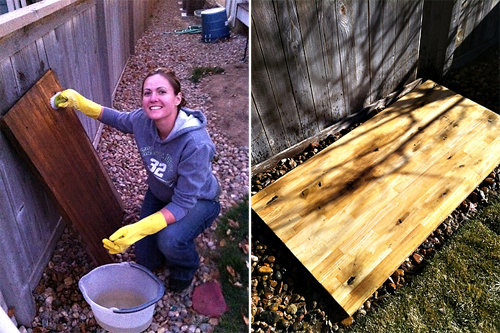
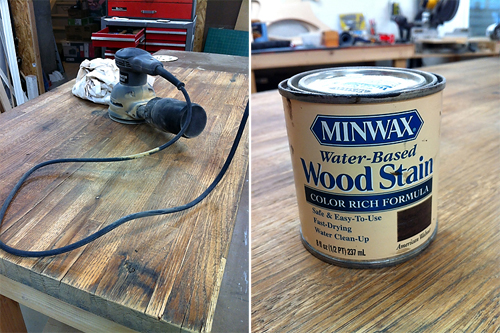
Okay, so you have all of your pieces… Now time for some wood. Left: old reclaimed wood that I found on Craigslist for $10.00. Right: Craigslist butcher block table cut to length and sanded, beat up, hand aged, and set out side wet to dry out and crack. (Note: wood does not dry out and crack in three days of snow. You can’t rush the awesomeness of wood aging. ) If you find reclaimed wood awesome, give it a good scrub. (Preferably in funny yellow kitchen gloves like me ) Otherwise Ikea or any other place you can find a piece of butcher block, will work great.
On our reclaimed piece of wood we had some places with rot. Make sure to scrape that out. Now for the piping. Most of the pipe comes unfinished. But you are dealing with plumbing not furniture legs. Some of the pipe will have a thick black tar like covering. Not to worry, it looks awesome once removed.
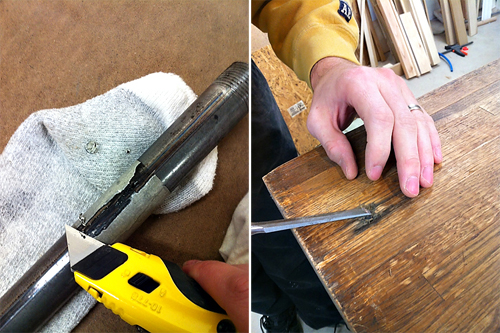
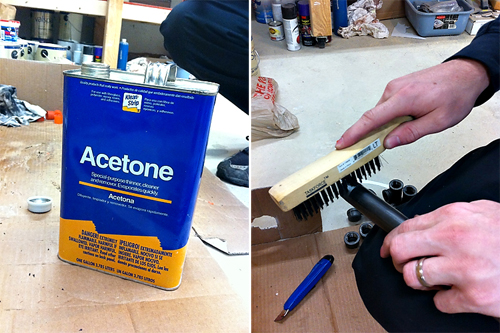
Next, spend what seems like forever using Acetone to strip off all the black goo covering from the pipes. Do not use water on this step, or you can run the risk of the pipe rusting in places. Get ready to muster up some good ol’ fashioned elbow grease, and a TON of rags. This step was messy. Wear gloves, the Acetone will be hard on your hands and brush the threaded ends with a wire brush after to make sure it will thread properly once you begin building.
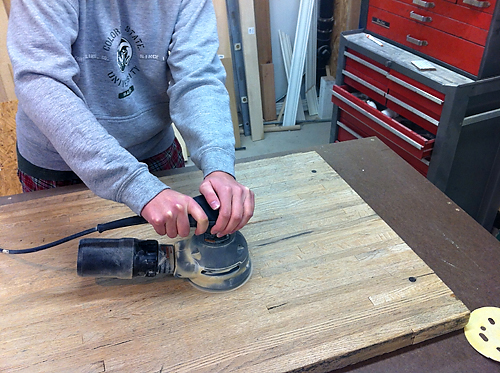
Back to the wood. Make sure you have a clean surface to start with. You can also use a small amount of the Acetone again to clean off any extra saw dust and dirt from the wood. Water will raise the grain back up, and after all the sanding you just did you don’t want that to happen.
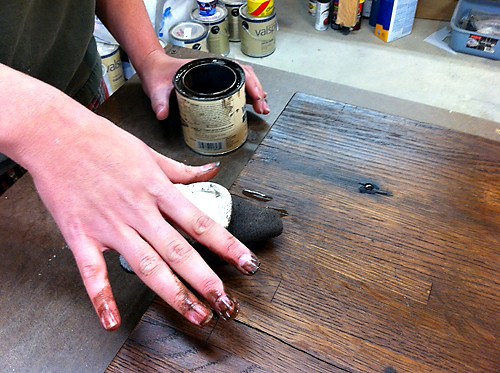
YEA! Staining time. We used Water Based Minwax American Walnut stain because we had that left over form an old project. When we went to get more for desk #2, we only found Oil Based… Huh. All in all they finished looking pretty close to the same but we had some trouble with the oil based stain.
Again, wear gloves or it will look like… Well, like you didn’t wear gloves.
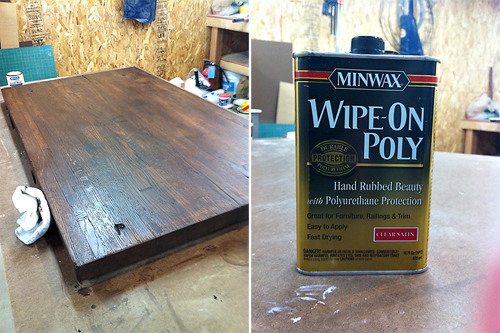
For both desks we finished with the ever so awesome Minwax Wipe-On Poly. Love this stuff. Literally dump some on a clean rag and rub it on. Easy Peasy! It looks awesome and has a slight hand rubbed finish. *Always finish in a dust free enviroment. Wink Wink* Do all of this twice and you have what we have!
Then assemble. This can be a bit trick because it all need to go in order, but I think trial and error is the way to go here. Make sure to level the legs. You can do so by adjusting the tightness of the fittings.
And NOW, for the final project! (Keep in mind we did this process twice for two separate desks.)
Desk #1 measures: 20×48
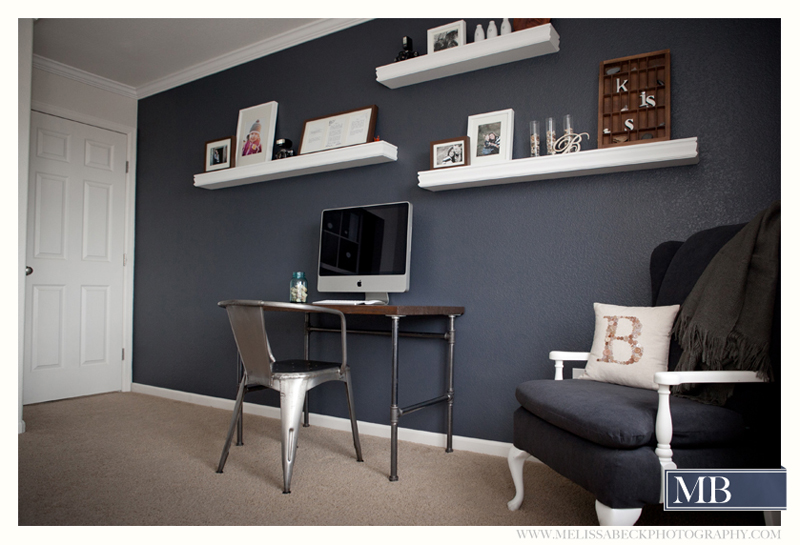
Desk #2 measures: 30×55
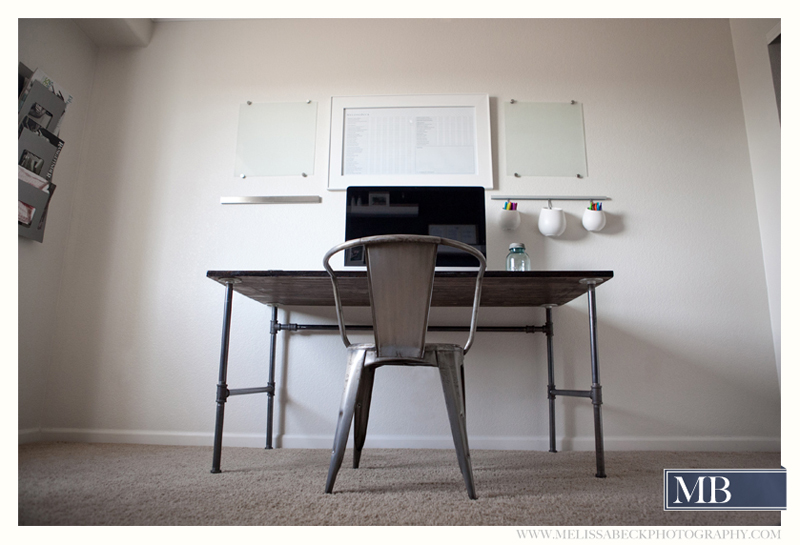
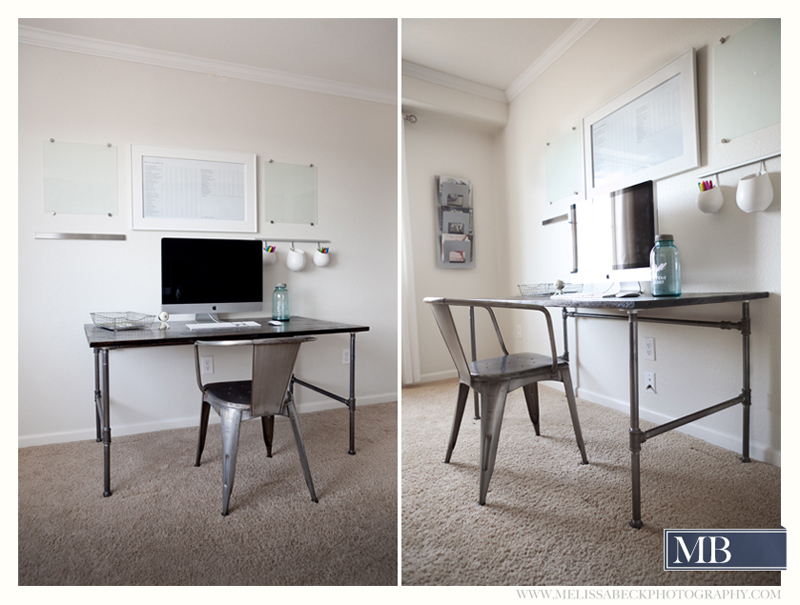
Total Cost of Project, Including both Desks: $225
Not too bad considering I was in love with the Restoration Hardware Flatiron Desk! Yikes. Have you seen the price tag on that beauty!?? What DIY project are you doing this weekend??
Melissa Beck is a professional Wedding Photographer and Engagement Photographer who has been featured on several blogs and publications.
Melissa Beck Photography is a Wedding Photography Studio specializing in Modern Wedding and Engagement photos in Maine, New England, Kennebunk, Portland, Freeport, Falmouth, Yarmouth, Cape Elizabeth, Denver,Colorado and the Rocky Mountains.
Contact Melissa Beck Photography to be your Maine and Colorado Wedding Photographer today.